Tuesday, April 30, 2013

Homemade Rice a Roni

I've been making this for years and it can be a side dish or add a salad and you have a quick all in one dinner.  Yummy!
1 pound ground beef (I used turkey) 
1 onion chopped 
one garlic clove minced (optional) 
2 Tbsp Oil 
2 Tbsp butter 
1 cup long grain rice 
8 ounces angel hair pasta~  broken up in small pieces about an inch long 
4 cups chicken broth.
Chopped almonds or pecans
Cook ground beef, and onion.  Drain grease if neccesary and set aside.  Melt oil in pan and add garlic.  Saute Rice and pasta till good and brown.  Add butter, broth and taste broth adjusting seasonings to your liking.  Bring to a boil and turn down to simmer.  Cook 20 minutes or till water is dissolved.  Check your rice and if need be, add 1/4 cup of water and cook till absorbed.   You might have to add more water depending on the type of long grain rice you used.  Allow rice to stand with lid so it can fluff up~ about 10 minutes.  Sprinkle liberaly with chopped pecans or almonds before serving. 


A Favorite Thing at Mockingbird Hill Lane Cottage

Women Living Well Monthly Link Up  

Monday, April 29, 2013

Freezing Milk

I know this might seem like quite a silly post, but I've seen some things and thought, "Why in the world didn't I think of THAT?"  ;)  So... I'm posting it anyways~! 
 
When I buy milk I purchase the gallon since it's only 1.88- 1.99 depending on pricing in my area.  Half Gallons run around 1.65.   We don't normally drink that much milk and I'd hate to let it spoil in the refrigerator.  Previously,

Plastic containers are recomended since glass will break with freezing and defrosting.  I leave enough air headspace at the top of the jar since the milk expands during freezing.  Into the freezer it goes~   I like the smaller amounts since we don't drink that much.   If I want to make yogurt I can easily just take out one quart container since it equals to four cups~ the amount called for in my recipe.  
And how can I resist taking a macro shot of this lovely tatted hanky I found at the thrift store and used as a staging prop.  
Mondays~ 
A Favorite Thing at Mockingbird Hill Lane Cottage
Sunday

Women Living Well~  monthly Link Up

Saturday, April 27, 2013

What I did with 25 pounds of flour~

A few months ago I purchased a 25 pound bag of flour since it was more economical than purchasing the smaller 5 pound bags of flour individually.  It's definitely about the savings since we would eventually use up the flour anyway~ so it definitely works for me. 

I tried writing everything down in keeping a tally of what I baked/made using the 25 pound bag and here is my list~   

24 loaves of bread 
Indian Bread 
Tortillas
3 Pizzas  (13 by 9 size)
Sour Cream Pound Cake 
Lemon Loaf~ got this recipe from Pinterest and had to throw the entire thing in the trash! grrrr  ;(  
Pound Cake  
(yes I was on the search for the perfect pound cake recipe as you can tell! ) 

If I were to have purchased 24 loaves of the cheapest bread available in my area (which is approximately .89 cents) I would have paid $21.30 cents for 24 loaves of bread.  I paid 9 dollars for my bag.  Technically my loaves are standard loaf pans which are smaller than store bought.  If I were to count  1 1/2 of my loaves as equivalent to one store loaf (which would be way more bread than one store bought loaf, it still would be cheaper~  including the Indian Bread and other items I baked as well.  My bread has no preservatives,  tastes awesome, and is much more economical.  There's also something therapeutic about getting your hands in the dough, kneading it and making your own bread.  In the past I was deterred from baking bread but have found that there are many quick recipes that take about an 70 minutes from start to finish.  Not bad, eh?

Here are some of the recipes that I made and have posted to the blog~ 
Homemade White Bread 

Have a wonderful day!  

Friday, April 26, 2013

Chicken Puff Pastry Roll

This officially, isn't a puff pastry but whatever you call it... it's good!  ;)   Technically it's a cream puff dough topped with a chicken/spinach/sour cream mixture and rolled up all pretty like!  
chicken puff pastry roll
2 cups of chicken~ deboned and seasoned to your preference
1 cup of sour cream  
1 cube butter (1/2 cup) 
dash of salt
1 cup water
1 cup flour 
4 eggs 
Spinach (optional~ squeeze out as much of the water as you possibly can)  

Mix together sour cream and chicken in bowl.  Squeeze out spinach removing as much water as possible and mix in with chicken mixture.   Set aside for later.  

Prepare Puff Pastry Dough. 
Bring water and butter to a rolling boil.  Stir in flour and salt until mixture forms a bowl.
Transfer the dough to a large mixing bowl.  Using a mixer, beat in the eggs one at a time mixing well after each addition.    

Spray cookie sheet with non stick spray and spread dough onto cookie sheet.  
Chicken Puff Pastry Roll
Bake at 375 degrees for 15 to 20 minutes till golden brown.  It will get all puffy and look totally wrong!  ;)  As it cools it will flatten out.  
Chicken Puff Pastry Roll
Let cool a bit and flip on to some aluminum foil to aid in rolling if desired.  Mine was undercooked a bit so it stuck to the bottom a bit.  ;(

Spread chicken mixture on top and spread out.   
Chicken Puff Pastry Roll
Roll up and slice to serve!  
Chicken Puff Pastry Roll
A Favorite Thing at Mockingbird Hill Lane Cottage

Women Living Well Monthly Link Up  


Tuesday, April 23, 2013

Homemade Apple Fritters

I found the original recipe over at Greek Food and Greek Life and tweeked it to my own liking.  
Quick and Easy with minimal ingredients~  

In large bowl mix together~ 
1 cup of flour~  heaping 
1/3 cup sugar 
1 tsp baking powder 
dash of salt 
1 tsp cinnamon

In seperate bowl combine wet ingredients~   
1/2 tsp vanilla 
1 Tbsp butter melted 
1 egg 
1/3 cup milk (plus additional if too dry) 
1 chopped apple 

Add dry ingredients to wet ingredients adding milk if neccesary till just combined.  

Drop by spoonfulls into hot oil and fry until golden brown.  Adjust the oil temperature to make sure fritters are being cooked through so they are not raw in the center.  

Mix together a bit of cinnamon and sugar and toss fritters in cinnamon sugar.  
Mondays~ 
A Favorite Thing at Mockingbird Hill Lane Cottage
Sunday
Women Living Well Monthly Link Up  

Monday, April 22, 2013

Bird's Nest Centerpiece

Its been a while since I've posted anything decor related.  With the coming of spring and Easter I saw so many other blogs featuring Egg Vignettes and I really wanted to try my hand at it too!  I scoured the Target dollar bins since I had seen some premade nests but I would have to dissassemble them and would have only gotten 3 eggs with holes in them where they were wired into the nest.  In the decor area I found a box full of 9 eggs with the nesting material which was way more than I needed.  

I pulled out some of the white china cups out  of my hutch and this is what I came up with.  
I set it atop my thrifted milk glass cake stand and platter...
...and added a cloche on top to keep the dust off.  
It sits on my kitchen table and I LOVE it!  

Mondays~ 
A Favorite Thing at Mockingbird Hill Lane Cottage
Sunday

Sunday, April 21, 2013

Pound Cake

We've been traveling all this week and just arrived back home~  and how good it is to be sleeping in my own bed!  Yay!  

I also wanted to thank you for taking the time to being a follower on blogger or google friend connect.  I don't use those options and prefer to follow by an RSS feed or I would gladly follow you back.  But I wanted to take the time to say thank you! 

What a great pound cake recipe I recently received from my friend Connie!  I added the zest of 2 lemons into the batter and used the juice in the glaze for some zing.  If you're a pound cake purist then the glaze isn't neccesary.  ;)

Grease Bundt pan and set aside. Preheat oven to 300 degrees.

Ingredients~
3 sticks butter (room temperature)
3 cups sugar
6 eggs
1 tsp vanilla extract
1/4 cup Crisco butter flavor shortening (or regular is okay)
1 cup evaporated milk
1 tsp lemon or vanilla extract
3 cups all purpose flour (I sifted mine)
1 tsp of salt
(zest of two lemons)

Cream together butter and shortening until light and fluffy.  Add sugar and continue to beat.  Add half of milk and eggs one at a time beating after each.  Add remaining milk and extract.  Add flour and salt and mix together.  Bake one hour at 350 degrees.  Insert toothpick

Glaze:
2 cups powdered sugar 
Juice of two lemons 
vanilla extract

With whisk mix in extract into powdered sugar and add enough lemon juice till the glaze is the right consistency.  

Saturday, April 13, 2013

Milk Glass and Sweetheart Flour Sacks

I've been wanting to get some new kitchen towels to match my Sweetheart Kitchen and I happened upon these at the thrift store last week for .50 cents each.
  I believe they were still new since it felt like the sizing was still on them.  
Love them!
And I also happened upon a milk glass candy dish or 2 dollars
Mondays~ 
A Favorite Thing at Mockingbird Hill Lane Cottage
Sunday


Friday, April 12, 2013

DIY~ Burrito Camera Lens Cover

I love photography and am always trying to improve my craft.  I'm blowing my own horn when I say that I take all of the photos posted on my blog.  ;)   

The lens covers I use now are not padded and I throw alot of stuff in my camera bag along with my lenses.  My lenses need a bit more padding.  
I saw similar lens padding at a well known photo site and decided to do my own.  The name brand  look alike burrito cases retail for 20 dollars each not including shipping.  Mine cost about 2 dollars each for the two burrito wraps that I purchased using premade quilty fabric from Walmart.
I traced around a very large dinner plate for my 50 mm lens.
 For my zoom and macro lens I traced around a large doily and went to snipping in a circle.

Wrap them up like a burrito with padding on both sides...
Hello Lens Burrito!
Here are my unpadded lens covers 
And the burritos still fit into the carriers.  
All nice and padded and ready for my camera bag!
Have a great day!
Mondays~ 
A Favorite Thing at Mockingbird Hill Lane Cottage
Sunday


Sunday, April 7, 2013

Homemade Farmer's Cheese

Little Miss Muffet sat on her tuffet eating her curds and whey~!  
That recitation has been going through my mind all week since I made my first batch of farmers cheese!  I never really knew exactly what curds or whey was but I do now~ and it was OH SO easy!  
I've been watching videos on youtube gleaning tecnique and recipes.  Some add cream and some don't but I'm sure it would be much more delicious with a higher fat content.  
Pour 1/2 a gallon of milk into a heavy bottomed pan and bring milk temperature to 180 degrees.  Do not boil the milk.  You just want it almost boiling.  Technically you don't need a thermometer~  when the milk starts to have tiny bubbles coming from the center of the pot you are at the right temperature. 
Add 1/4 cup vinegar to the near boiling milk and watch the magic happen.  Stir the pot and you'll see the milk seperate into curd and whey.  
Drain cheese in some cheese cloth or a cloth napkin until desired consistency.  You can always add more whey if you have removed too much.  
Add about 1 Tbsp of salt and herbs of your choice and mix it in well.   
If you like your cheese dry you can hang it from your faucet.  
If you like it more moist you can forgo hanging. 
Makes a great filling for pierogis or you can use in place of ricotta cheese in lasagna.  Drizzle with olive oil and serve on crackers.
Mondays~ 
A Favorite Thing at Mockingbird Hill Lane Cottage
Sunday

Friday, April 5, 2013

Homemade Yogurt

Homemade yogurt in crock pot,  Homemade yogurt in slow cooker.      
Homemade yogurt in crock pot,  Homemade yogurt in slow cooker.
Ingredients 
4 cups of Milk~  for thicker yogurt use whole milk 
1/2 cup dry (powdered milk but I used 3/4 cup) 
1/4 cup plain yogurt with live yogurt cultures as a starter.  I used Greek Yogurt

Step One~  Place milk in pot and heat up till milk is almost boiling which is 180 degrees.  You don't neccesarily need a thermometer for this part but I like to be sure.  When bubbles start to arise  in the middle of the pot then it's at the right temperature.  Cover.  

Step Two~  Let sit for approximately 2 1/2 to 3 hours.  Here's where using a thermometer is handy.  Your milk should be at 110 degrees.    

Step Three~  Remove 2 cups of the yogurt and put in seperate bowl..  Whisk in 1/2 cup powdered milk and 1/4 cup yogurt.  Whisk well.  Place back in crock pot and whisk again.  Cover crockpot with a towel or a blanket to hold in heat and let sit for 8 hours. There are two things needed for success in making homemade yogurt.  First~ It's important to keep your pot in a draft free place.  On my second batch we left the kitchen door open and my yogurt was a failure.  The BEST place to keep your yogurt is wrapped up in towels and place it in your oven after you have removed the racks so it can fit.  The second thing is temperature.  180 degrees for the milk in the first step and 110 for adding ingredients.  

After 8 hours you should have yogurt.  You can put the yogurt in jars or tupperware and refrigerate.  If there is any seperation of yogurt and whey you can take off the whey and throw it away or use it in bread recipes in place of water.  Whey will stay good in the refrigerator in a glass jar for a few months.

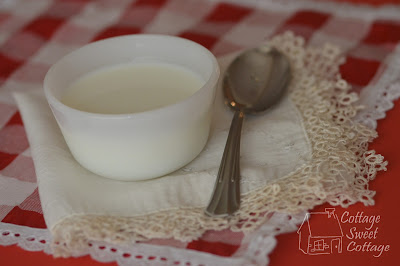
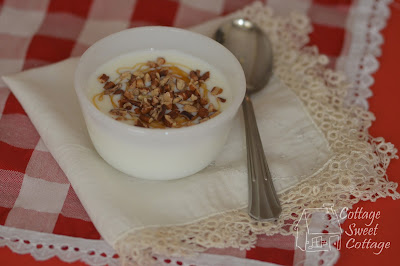
This is unsweetened yogurt so I've added a bit  lot of honey.
Homemade yogurt in crock pot,  Homemade yogurt in slow cooker.
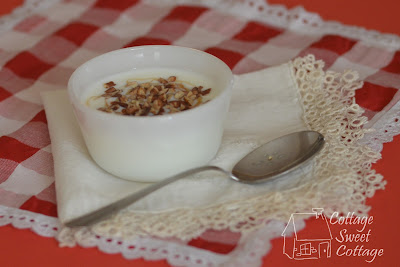
And some chopped pecans.  I like texture!  I should have added fruit~ next time!
Homemade yogurt in crock pot,  Homemade yogurt in slow cooker.
Save 1/4 cup of your culture for your next batch.  You can even freeze the yogurt since the good bacteria is not killed by the cold temperatures.  

The one struggle I had to get over about eating homemade yogurt was that I knew exactly how long a milk product sat unrefrigerated.  11 hours!  I'm paranoid about food going bad coupled with food poisoning so it was a big hurdle for me honestly.  I've been eating this yogurt for 2 days now and I can't wait to try it with fruit smoothies.  

This post was first published as Walkaway Crockpot yogurt.  After a failed attempt I edited that so it's nearly foolproof.